Companies like Shield are responsible for making concrete testing cylinders for future compression tests on hundreds of projects in the Southeast.
Making a concrete cylinder involves ensuring that it is made to the exact specifications of ASTM standards and that it can withstand years of loading without cracking or deformation. The failure of a single concrete cylinder can invalidate an entire project's results, costing the client both time and money.
In this article, we are going to cover the five things to remember when it comes to concrete testing cylinders. Let’s get started.
5 Things You Should Know: Concrete Testing Cylinders
1. Sampling the Concrete
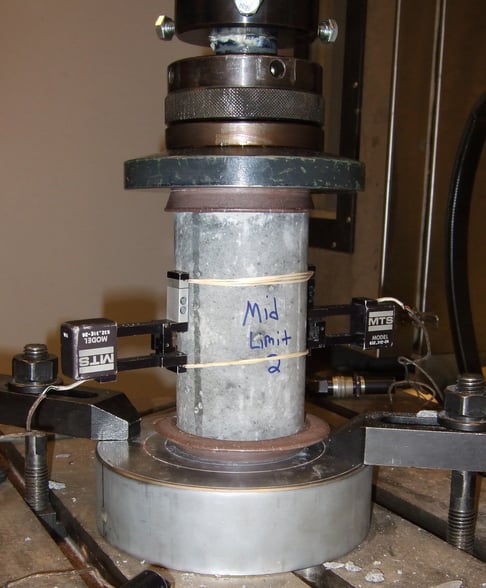
The goal of a concrete testing cylinder is to test the strength of hardened concrete.
If the concrete has not been thoroughly mixed, dried clumps of concrete may find their way into the forms, causing slump and air entrainment testing to be inaccurate. This will yield a weaker product than if the concrete was mixed correctly.
2. Measuring Slump
Slump is a measurement that can determine the consistency of the pre-hardened concrete.
Slump is measured in classes from S1 to S5 (depending on the consistency of the concrete). Here is a chart demonstrating the various classes of slump and the target slump values.
S1 would be more of a dry mix whereas S5 is the opposite.
Your target slump measurement is dependent on the type of project you are trying to complete. An S1 would be a great option for pipework bedding while an S4-S5 would be what you would use for more technical projects like building foundations or slabs.
Need help with measuring “slump”? Give us a call today to get your project underway.
3. Consolidating the Cylinders
Adequately consolidating your cylinders is crucial in the concrete space.
After rodding the cylinders, consolidating the cylinders with an ample amount of force is necessary to ensure the cylinders do not have a “Swiss cheese” appearance when extruded from their casing.
Keep in mind that fully-consolidated cylinders will break closer to their full potential than cylinders that have been weakly consolidated.
4. Handling the Cylinders
You don’t want your testers to be too close. But, you also don’t want them to be too far away from the “pour site” either.
Testers should be close enough to the pour location to keep an eye on any concrete being placed, yet far enough away to ensure that freshly-cast test cylinders do not have far to travel to their curing site and are not disturbed by construction personnel.
5. Transporting the Cylinders
Do you need to transport your cylinders to another location?
Concrete test cylinders should be secured while in transit. This will minimize the amount of impact during stop-and-go driving and will help freshly cured concrete test cylinders break to their maximum potential strength.
Pour Concrete That Will Last the Test of Time
As you can see, the process is quite a bit more detailed than most people assume. If you want tangible results for your concrete testing efforts, ensure that you account for these factors before moving forward.
Need help making your concrete testing cylinders…now? For more information about concrete testing cylinders and the process of making them, contact our team.

